T o r eturn to cl ock mode fr om Progr am Setting Mode, pres s MENU twice.
T o r eturn to cl ock mode fr om Countdown Mode, pres s MENU once.
1. Clock Mode –
The screen will display
the current time and day .
2. Progr am Mode –
Enables you t o scroll
through t o view or set
the 16 progr am settings.
3. Countdown Mode –
Enables you t o simply
set the timer to turn ON
or OFF at a later time.
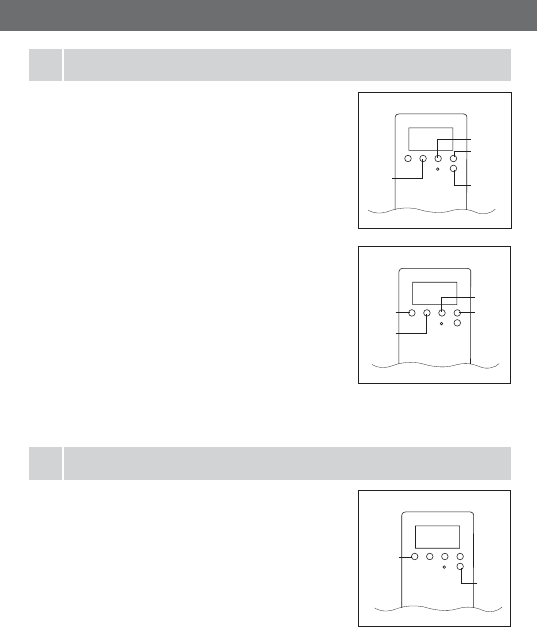
A Clock Mode - Setting the Cl ock
B Pr ogram Mode – Navigating Pr ogram Mode
(i) Is it Standar d or Daylight Savings Time? In
Clock Mode pr ess RCL t o change to Summer
Time – the display will show +1h. Pr ess RCL
again to r eturn to Standar d time.
(ii) Pres s and hold OK until the days of the week
at the top of the display flash.
(iii) Use the UP and DOWN buttons to set the day
of the week.
(iv) Pr ess OK to c onfirm – the hour display will flash.
(v) Use the UP and DOWN buttons to set the
current hour (in s tandar d time).
(vi) Pres s OK to confirm – the minut e display will flash.
(vii) Use the UP and DOWN buttons to set the minut es.
(viii) Press OK to c onfirm.
(ix) Pr ess MENU t o finish.
Change to Pr ogram Mode – pr ess MENU once fr om
Clock Mode or twice fr om Countdown Mode.
The number 1 and wor d ON will flash, meaning you
are l ooking at the 1st Pr ogram ON time.
If no days are shown and the time is --:--:-- this
means no time has been set.
Pres s RCL to del ete a pr ogrammed time. T o res tor e
a deleted time pr ess RCL again.
Hint: If you only want t o change the day or hour, you can e xit setting the clock
at any time by pres sing MENU.
Pres s the UP button to change the display – now the number 1 and word OFF
will flash, meaning you ar e looking at the 1st Pr ogram OFF time. Use the UP
and DOWN buttons to scr oll through the timer settings.
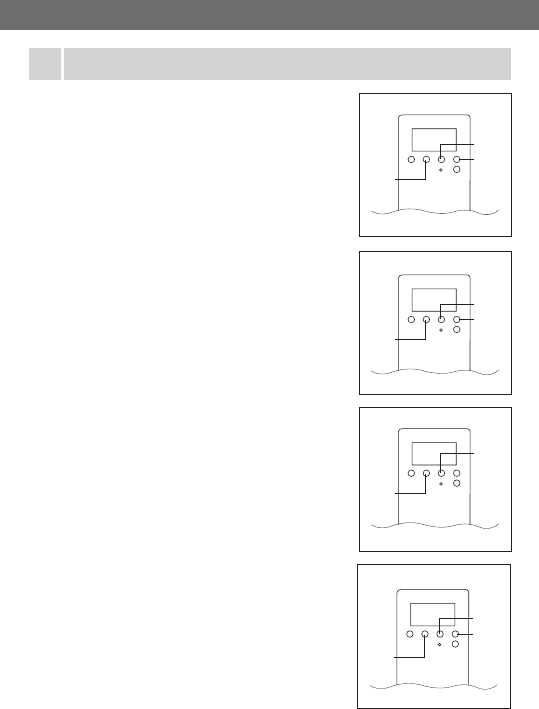
C Pr ogram Mode – Setting a Pr ogram
(i) In Progr am Mode use the UP and DOWN
buttons scr oll to the pr ogram you want to set.
Example: Pr ess the UP button once to scr oll
to Pr ogram 1 ON setting. The number 1 and
word ON will flash.
(ii) Pres s OK to enter the Pr ogram Setting
Proc edur e. The day setting will flash.
(iii) Use the UP and DOWN buttons to choose
which days of the week you want the timer to
operate. Day combinations include:
- Daily (Monday – Sunday)
- Monday, T uesday, Wednesday, Thursday,
Friday, Satur day or Sunday
- Monday – Friday onl y
- Monday – Saturday onl y
- Saturday & Sunday onl y
- Monday – W ednesday only
- Thursday – Satur day only
- Monday, W ednesday and Friday onl y
- T uesday, Thursday and Saturday only
The day combinations allow for fle xibility in
program settings. Y ou may like to scroll thr ough
the list a few times to get the feel f or the
combinations befor e confirming your setting.
(iv) Pres s OK to confirm. The hour will flash.
(v) Use the UP and DOWN buttons to choose
what hour you want your devic e to switch ON.
F or exampl e if you want the timer to come
at 5:15pm pres s the UP button until 17:00
is displayed.
(vi) Pres s OK to confirm. The minute setting will
(vii) Use the UP and DOWN buttons to finish

D Activate the Timer and Timer Override
T o have the timer automaticall y operate your
device the wor d AUTO must be displayed when in
Clock Mode.
Pres s the UP button to scroll thr ough 4 options:
- ON: power is available t o your device at all times.
This is the same as leaving your de vice plugged
in at the wall.
setting the time you want your devic e to switch ON.
In this exampl e pres s the UP button until 17:15 is displayed.
(viii) Pres s OK to confirm. The number 1 and ON will flash.
(ix) Pr ess the UP arrow to mo ve to the Pr ogram 1 OFF setting. Pr ess OK to
enter the pr ogram setting pr ocedur e. The day setting will flash.
(x) Use the UP and DO WN buttons to choose which days of the week you
want the timer to switch OFF . This will probabl y match your settings in
Progr am 1 ON, but if you want your timer to r emain ON overnight,
remember t o choose a setting that corr esponds to the foll owing day of
the week. Pres s OK to confirm, the hour will flash.
(xi) Use the UP and DOWN butt ons to choose the hour you want your devic e
to switch OFF . T o set the OFF time to be 7:05pm, pres s the UP button
until 19:00 is displayed. Pr ess OK to c onfirm and the minute setting
(xii) Use the UP and DO WN buttons to finish setting the OFF time.
In this exampl e pres s the UP button until 19:05 is displayed. Pres s OK
(xiii) Pr ess MENU twice to r eturn to clock mode or use the UP and DO WN
buttons to scr oll to other program settings if mor e are requir ed.